Prototyping hardware
In the previous chapters we discussed Arduino programming, I²C and LCDs.
The DIY-MIDI-Music-Workstation-Pedal-Board uses four 2004 LCD Displays (20 characters, 4 rows) which
offers plenty of room to display information even in bad lighting conditions. We can use 4 Rows or use BigChar
techniques to show characters spanning two, three, or even four rows. It is time to turn the breadboard hardware into
a reusable component.
Component Diagram
A component diagram (see UML) breaks down the actual system under development into various high levels of functionality. Each component is responsible for one clear aim within the entire system and only interacts with other essential elements on a need-to-know basis. It’s interaction between one component (core computer / user) and the display component (Arduino –> I²C –> LCD display). So it looks like this:

Prototyping component interfaces
In Part 1, we learned how to simulate an LCD display entirely in Java using a custom TrueType font rendered in JavaFX. That was a great first step, but a display isn’t much use unless it actually displays something. Now it’s time to connect the hardware dots. To demonstrate component interaction, we’ll use a simple Arduino based test program that listens for incoming strings via the serial port and displays them on an actual LCD.
// Set the LCD I2C address (usually 0x27 or 0x3F)
LiquidCrystal_I2C g_lcd(39, 16, 2);  // (address, columns, rows)

void setup()
{
    g_lcd.init();
    g_lcd.backlight();
    g_lcd.clear();

    Wire.begin();
    Wire.setClock(400000); // Set I2C clock to 400 kHz

    Serial.begin(115200);
}

void loop()
{
    if (Serial.available()) {
        String cmd = Serial.readStringUntil('\n');
        cmd.trim();

        g_lcd.setCursor(0, 0);
        g_lcd.print(cmd);
    }
}
This sketch puts the Arduino into a tight loop, waiting for incoming data on the serial line.
Whatever text you type into the terminal (followed by RETURN) will be rendered on the first line of the LCD.
To identify your connected Arduino device open a terminal and enter: ls -l /dev/cu.*
…which results in something like /dev/cu.usbserial-nnnn. Then, to open a serial connection at the correct
baud rate (115200 bps), matching the Serial.begin(115200) by typing:
screen /dev/cu.usbserial-nnnn 115200. Now you’re live! Type anything, press ENTER, and it shows up on the LCD.
To exit the terminal: Press Ctrl+A followed by Ctrl+D.
Protocol
While having a physical interface is essential, communication requires structure, a protocol. Instead of relying on verbose formats like XML or JSON, we keep it simple and efficient with a minimal string-based syntax that’s easy to parse and ideal for resource-constrained environments like microcontrollers.
For now, we support a handful of core commands (all terminated by \r:
| Command | Parameters | Description |
|---|---|---|
CLR |
A/0–3 |
Clear one or all displays |
STC |
A/0–3 row col |
Set cursor on given display |
WRT |
A/0–3 text... |
Print line of text to display, terminated by newline |
BLK |
A/0–3 0|1 |
Toggles blinking cursor |
Serial test
Using screen to talk to your Arduino over serial isn’t exactly fun — you don’t even see what you type.
But hey, typing blindly is a core competency for seasoned developers, right?
Typing screen /dev/cu.usbserial-1410 115200 opens a terminal session,
and whatever you type gets sent directly to the Arduino. There’s no visual feedback, no echo,
just pure trust and instinct.
When terminating a screen terminal chances are high, sockets are still up and running blocking access from your
Arduino IDE, preventing further uploads.
On MacOSX the following command shows the process that’s still holding the port.
Once identified, you can forcefully terminate it: sudo lsof /dev/cu.usbserial-1410.
Now we send the blocking process to hell by kill -9 <PROCESS_ID_FROM_LSOF>
Boom. Serial freed. Uploads possible again. Crisis averted.
Serial is for Sissies
Let’s be honest — staring into a black terminal window with no feedback, typing blindly into screen, and debugging ASCII with hex tables, that’s not fun anymore. Maybe it never was. So if you’re like me — too old for that sh*t (quote credit: Bruce Willis, probably) — why not make your life easier?
Let’s Talk Human: Build a Friendly Serial Terminal!
Instead of relying on ancient tools that feel like command-line archaeology, let’s build a small,
human-friendly terminal application in Java
fully under our control. Let’s write a proper terminal app, because the command line is for the young, the brave,
or the reckless.
package de.diy_pedalboard.controls;

import com.fazecast.jSerialComm.SerialPort;

import java.io.OutputStream;
import java.util.Scanner;

public class SerialTerminalApp
{
    private static SerialPort currentPort = null;
    private static int defaultBaudRate = 115200;

    public static void main(final String[] args)
    {
        System.out.println("=== Serial Terminal App ===");
        System.out.println("Commands:");
        System.out.println("  list                       - List available serial ports");
        System.out.println("  use <port> [baud]          - Select and open a port (default baud 115200)");
        System.out.println("  cmd <string>               - Send command to selected port");
        System.out.println("  exit / quit                - Exit the program");
        System.out.println();

        Scanner scanner = new Scanner(System.in);

        while (true) {
            System.out.print("> ");
            String line = scanner.nextLine().trim();
            if (line.isEmpty()) continue;

            String[] tokens = line.split("\\s+", 2);
            String command = tokens[0];

            switch (command.toLowerCase()) {
                case "list":
                    listPorts();
                    break;

                case "use":
                    if (tokens.length < 2) {
                        System.out.println("Usage: use <port> [baud]");
                        break;
                    }
                    usePort(tokens[1]);
                    break;

                case "cmd":
                    if (tokens.length < 2) {
                        System.out.println("Usage: cmd <text>");
                        break;
                    }
                    sendCommand(tokens[1]);
                    break;

                case "exit":
                case "quit":
                    closePort();
                    System.out.println("Exiting.");
                    return;

                default:
                    System.out.println("Unknown command. Type 'list', 'use', 'cmd', or 'exit'.");
            }
        }
    }

    private static void listPorts()
    {
        SerialPort[] ports = SerialPort.getCommPorts();
        System.out.println("Available ports:");
        for (SerialPort port : ports) {
            System.out.println("  " + port.getSystemPortName() + " - " + port.getDescriptivePortName());
        }
    }

    private static void usePort(String input)
    {
        ...
    }

    private static void sendCommand(String message)
    {
        ...
    }

    private static void closePort()
    {
        ...
    }
}
Now, if ou run the program you will see:
=== Serial Terminal App ===
Commands:
list                       - List available serial ports
use <port> [baud]          - Select and open a port (default baud 115200)
cmd <string>               - Send command to selected port
exit / quit                - Exit the program
>
When typing: > list the program lists all serial ports:
Available ports:
cu.Bluetooth-Incoming-Port - Bluetooth-Incoming-Port
tty.Bluetooth-Incoming-Port - Bluetooth-Incoming-Port (Dial-In)
cu.usbserial-1410 - USB2.0-Serial
tty.usbserial-1410 - USB2.0-Serial (Dial-In)
>
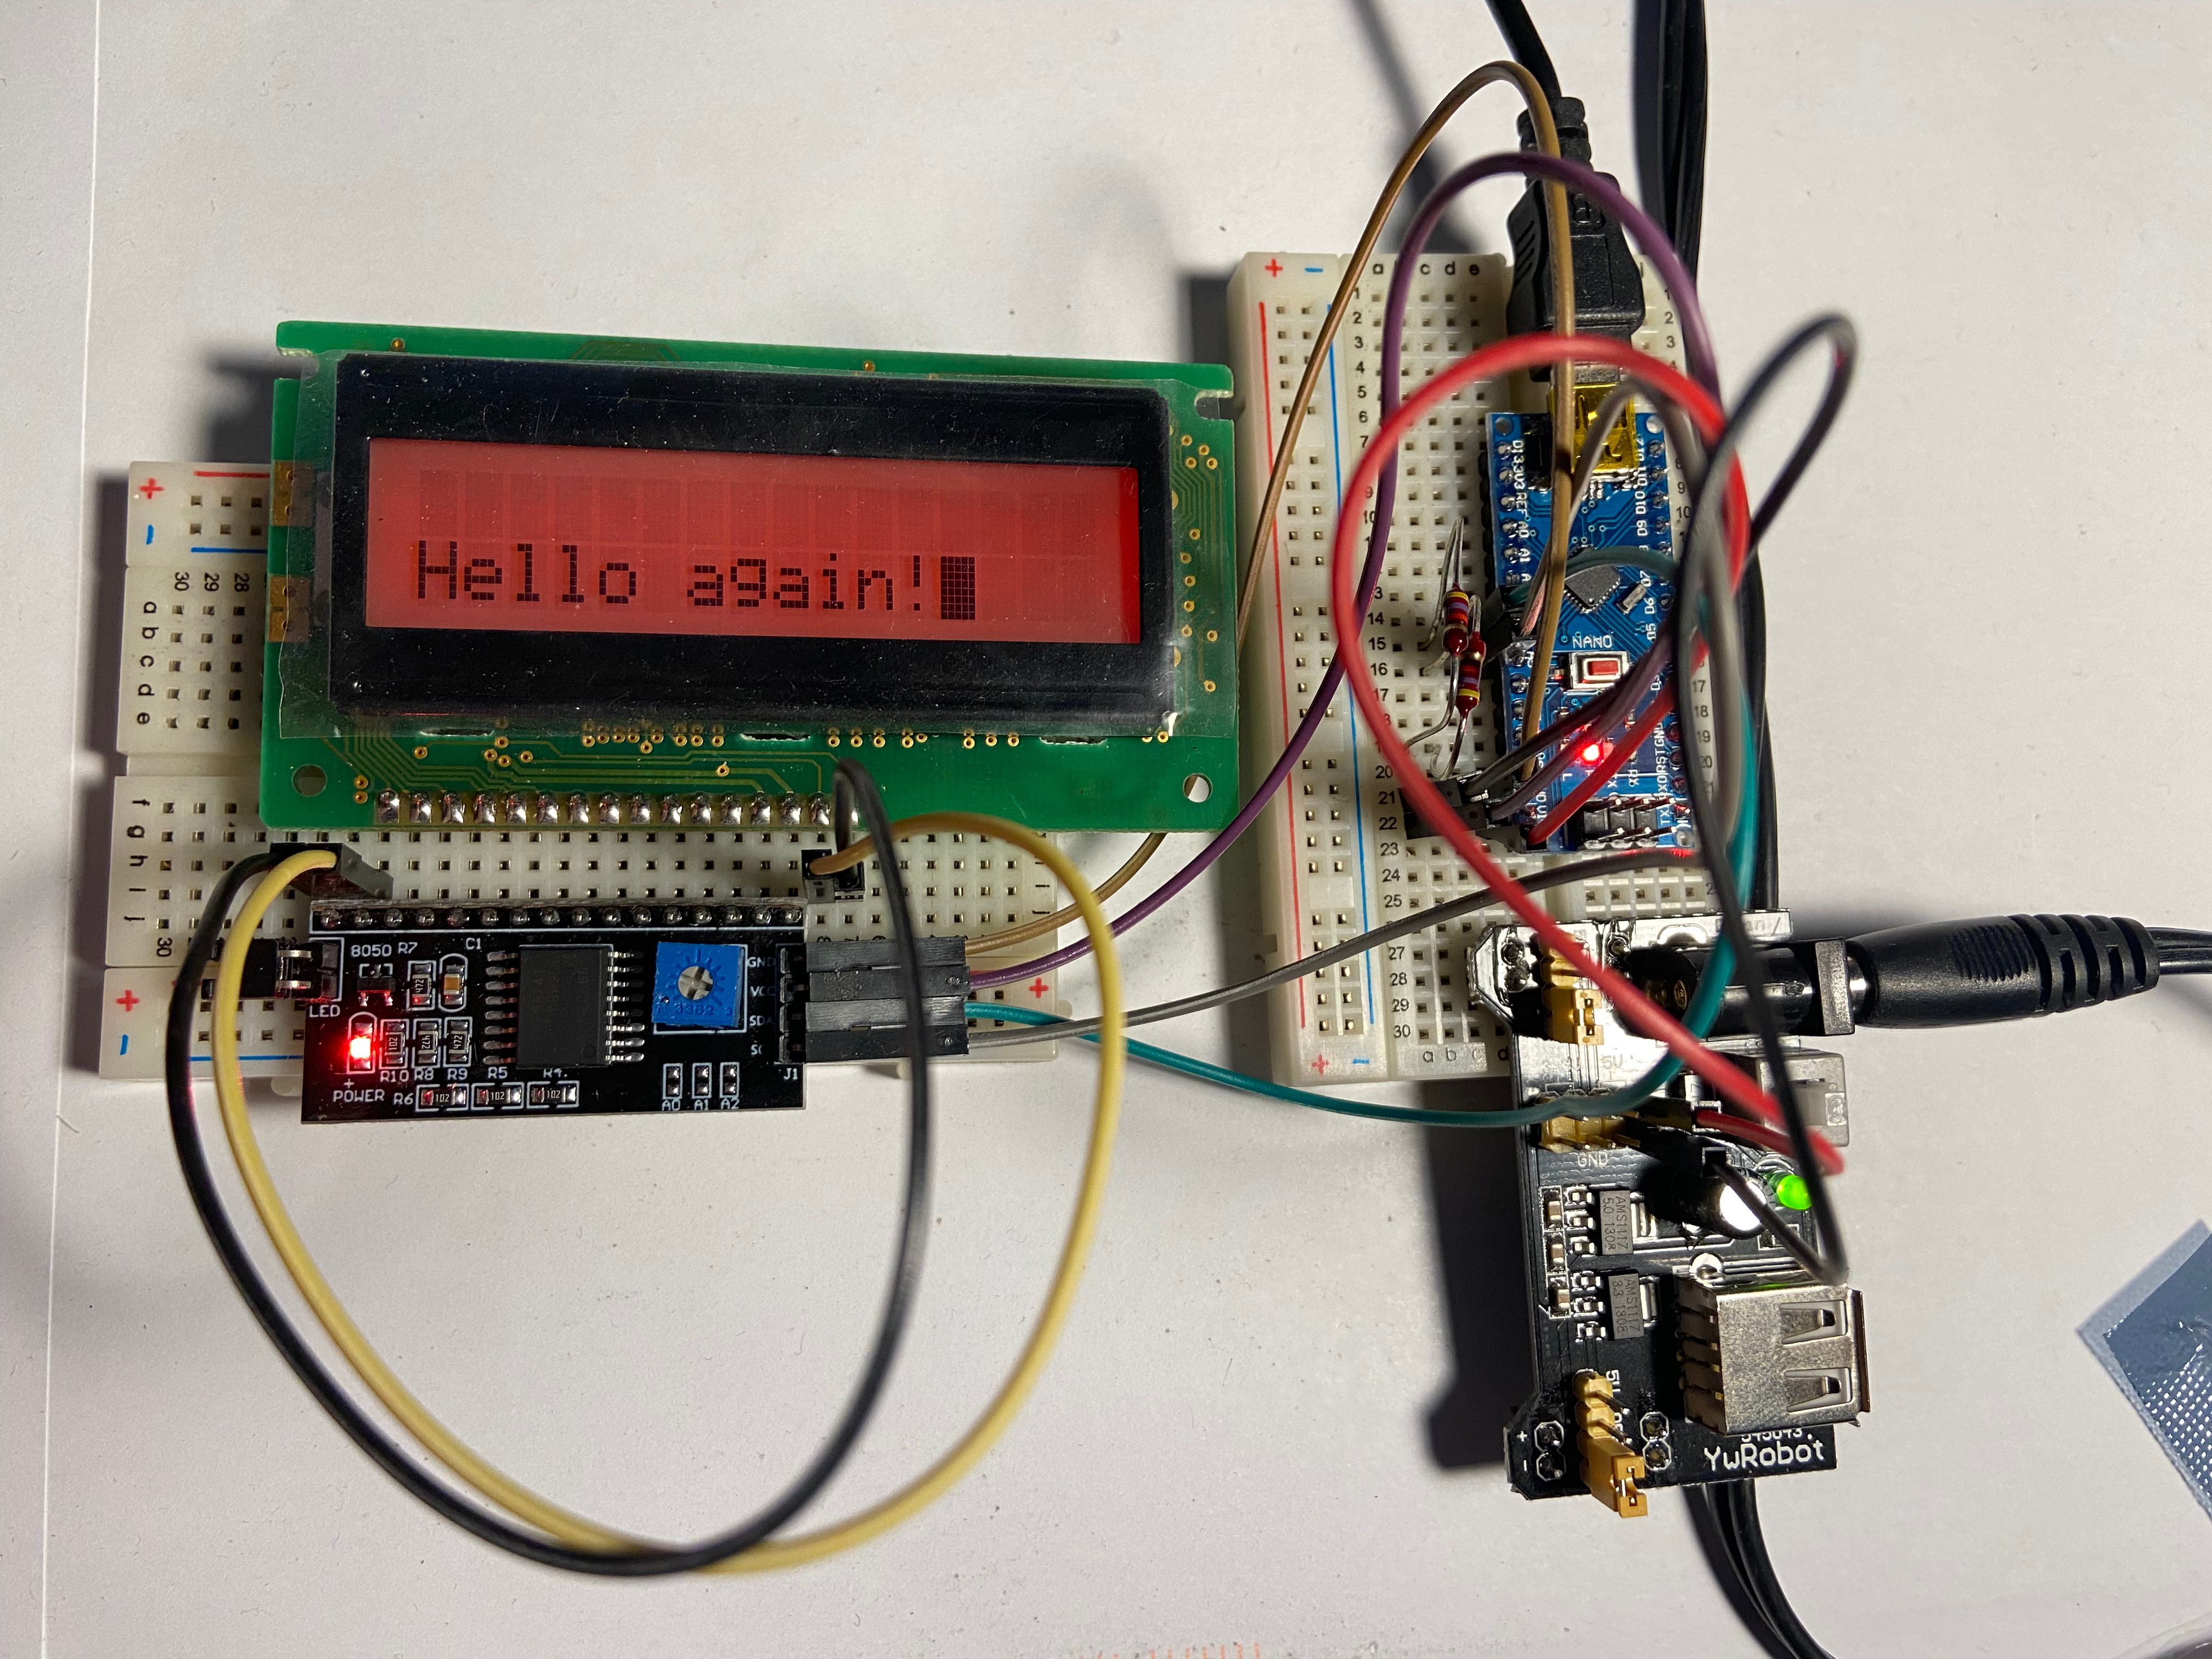
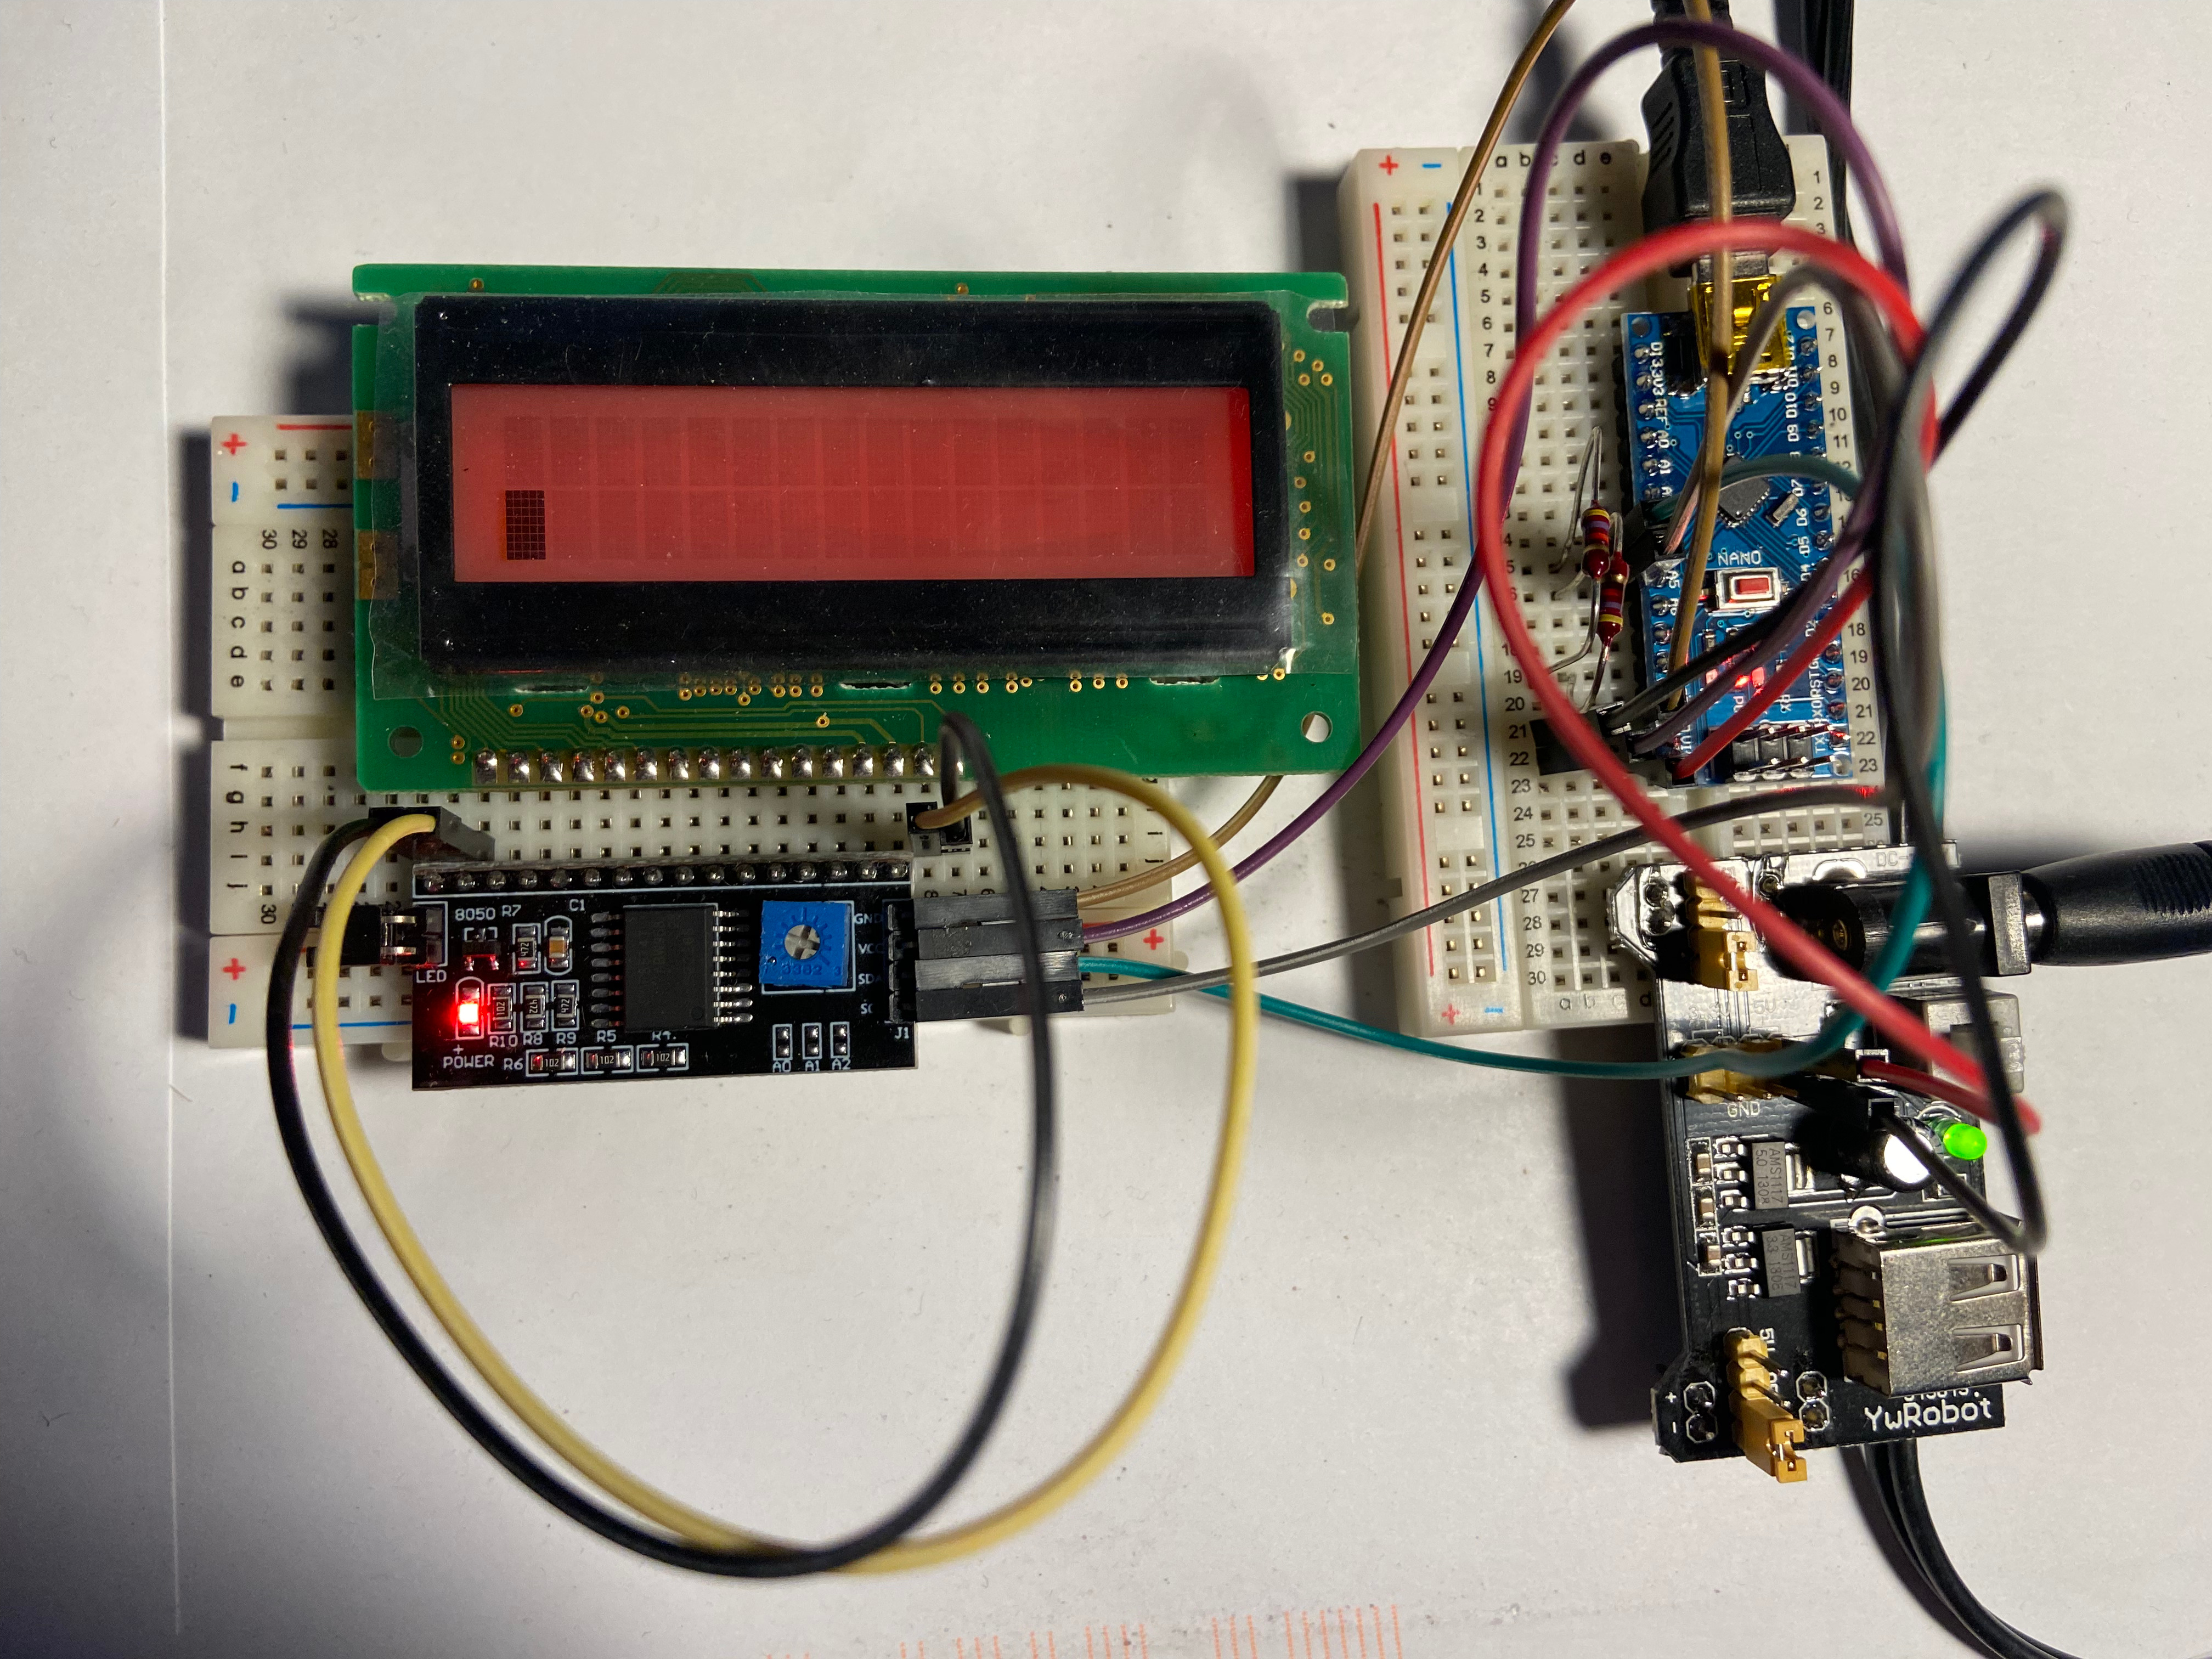
When typing: > use cu.usbserial-1410 115200 we are online!
Set cursor position: cmd STC010
Activate cursor: > cmd BLK01
Cursor blinks and is positioned in the 2nd row.
Show a message: > cmd WRT0Hello again!